How We Safely Remove Moss from Stone & Walkways
Learn how we safely remove moss from stone, exposed aggregate, and walkways using the right cleaners and low-pressure techniques without damaging your surfaces.
A Customer’s Question About Mossy Stone and Walkways
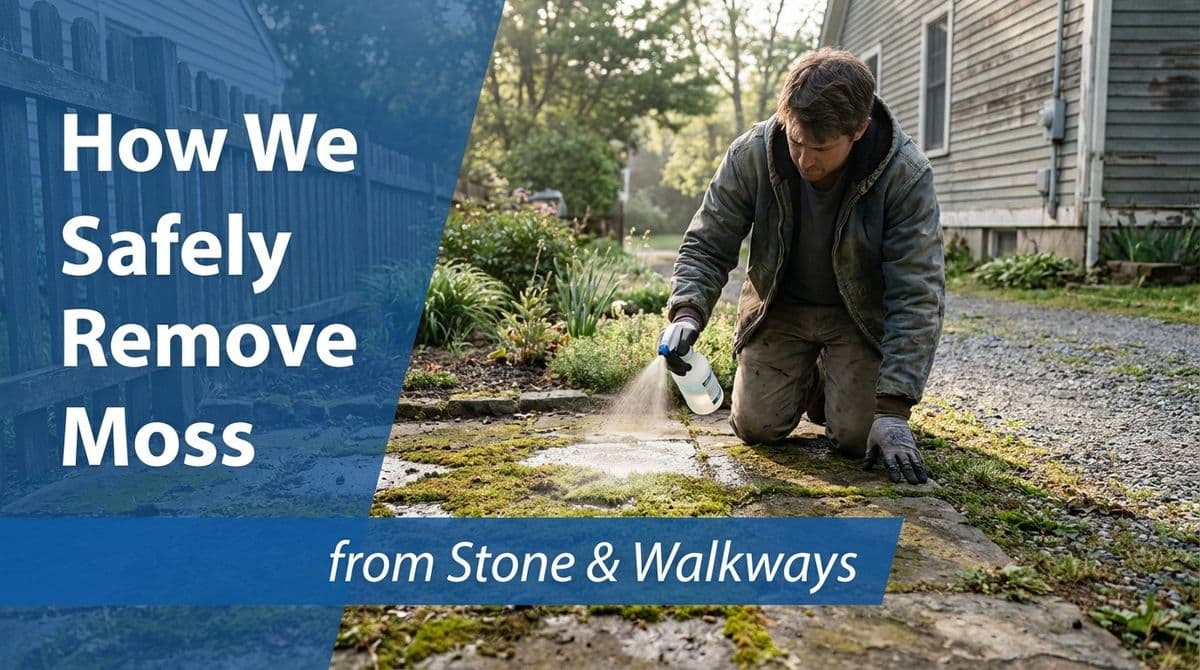
We recently got a call from a homeowner — let’s call him Rick — who lives just outside of town with a beautiful stone-faced front entry and exposed aggregate walkways. Over the years, shade and our damp Northwest weather had done their thing: moss was creeping up the stone to about shoulder height and spreading across the aggregate and front walk.
Rick’s big concern was one we hear a lot: “Can you get rid of all this moss without blasting the stone or ruining the surface?” He’d heard horror stories about pressure washing that etched concrete, loosened mortar, or left stone looking patchy and scarred.
On the phone, we walked Rick through exactly how we safely remove moss from stone, exposed aggregate, and walkways. In this post, we’ll share the same step-by-step approach so you can understand what’s involved — and what to watch out for if you tackle some of it yourself.
Why Moss Loves Stone, Aggregate, and Walkways
Rick had moss on three main areas: the vertical stone facing on his home, the stone along the ground in front of it, and his exposed aggregate walk. That’s a perfect combination for moss growth, especially in a moist climate.
Here’s why these surfaces are so prone to moss:
- Texture and pores: Natural stone and exposed aggregate have lots of tiny pockets where spores settle and anchor.
- Shade and moisture: North-facing walls, overhanging trees, and clogged gutters keep things damp and dark — ideal moss conditions.
- Organic debris: Dirt, pollen, and leaf litter act like fertilizer and a sponge that holds moisture against the surface.
Understanding this helps explain why “just blasting it” with high pressure is risky. The moss is intertwined with the surface; if we’re too aggressive, we don’t just remove moss — we remove part of the stone or concrete, too.
Our Gentle, Step-by-Step Moss Removal Process
With Rick, we explained that safe moss removal is less about brute force and more about using the right combination of chemistry, technique, and controlled pressure. Here’s the general process we follow.
1. Inspect and test before touching a pressure washer
On site, we always start with a visual inspection. For Rick, that meant checking:
- What kind of stone facing he had (natural vs. manufactured stone veneer)
- The condition of mortar joints and any cracks or loose pieces
- How deep and thick the moss growth was
- Drainage and splash-back areas that stay wet longer
On delicate or older stone, we do a small, inconspicuous test spot first. If the stone is soft, flaking, or the mortar is weak, we dial techniques back even further or skip pressure entirely in those areas.
2. Start with mechanical removal (no pressure yet)
Before involving any chemicals or pressure, we like to remove as much loose moss as possible by hand. On Rick’s job, we used:
- Soft- to medium-bristle brushes for vertical stone
- Stiff deck brushes for exposed aggregate and flat walkways
- Plastic scrapers for heavy clumps around grout or joints
This step does two things: it protects the surface from over-cleaning, and it lets our cleaning solution penetrate what’s left of the moss more effectively.
3. Use the right cleaner — not bleach in a bucket
Homeowners often ask if they can just pour straight bleach on moss. We strongly advise against that on most decorative stone and aggregate. Undiluted bleach can:
- Discolor or lighten stone and exposed aggregate unevenly
- Damage nearby plants and lawn
- Accelerate corrosion on metal fixtures and railings
Instead, we use diluted, exterior-safe cleaners designed for masonry and concrete. Depending on the surface, that might be:
- A commercial, biodegradable moss and algae cleaner
- A masonry-safe, low-sodium hypochlorite mix at the correct dilution
- A pH-neutral stone cleaner for natural stone that’s more sensitive
For DIYers, we suggest looking for products specifically labeled for moss removal on masonry or exposed aggregate, and following the dilution and dwell-time instructions exactly. Always pre-wet surrounding plants and rinse them lightly afterward.
Safe Pressure Washing on Stone and Exposed Aggregate
Once the cleaner has had time to work (often 10–20 minutes, without letting it dry), we move to rinsing. This is where damage usually happens if the wrong equipment or settings are used.
4. Control pressure, tips, and distance
On most residential stone and exposed aggregate, we almost never use “full blast” pressure. Instead, we adjust down to a safer range and rely on the chemistry and dwell time to do the heavy lifting. Key points we explained to Rick:
- Use a wider fan tip: Typically 25° or 40°, never a pinpoint or turbo nozzle on decorative stone or aggregate.
- Keep the wand moving: We use steady, overlapping passes and never linger in one spot.
- Maintain distance: Starting farther away and creeping in only as needed prevents etching and mortar damage.
On vertical surfaces like his stone façade, we often work from the bottom up to avoid streaking, then rinse from the top down to carry everything away evenly.
5. Adjust technique for different surfaces
Even on one property, each surface can need a slightly different approach:
- Natural stone facing: We prioritize low pressure and gentle cleaners, protecting mortar joints and any sealers.
- Manufactured stone veneer: Often softer; we are especially cautious with pressure and avoid harsh chemicals.
- Exposed aggregate: We’re careful not to dislodge the small stones; medium pressure and wide tips are key.
- Plain concrete walkways: Usually the most forgiving, but still vulnerable to visible wand marks if overdone.
Preventing Moss from Coming Right Back
Rick also wanted to know how to keep the moss from returning so quickly. In our climate, we can’t stop it completely, but we can slow it down and make future cleaning easier.
6. Improve drainage, light, and cleanliness
We walked Rick through a few simple changes that make a big difference:
- Keep gutters and downspouts clear so water doesn’t splash and sit on walls and walks.
- Trim back overgrown shrubs or low branches to allow more sunlight and air flow.
- Blow or sweep walkways regularly to remove leaves and needles that hold moisture.
Even doing these once a month during the wet season can noticeably slow down moss growth.
7. Consider sealing appropriate surfaces
On some types of stone and most exposed aggregate or concrete, a quality sealer can help. It doesn’t stop moss entirely, but it:
- Makes the surface less porous, so moss has a harder time anchoring
- Makes future cleanings easier and gentler
- Can enhance color and protect against staining
We always check manufacturer guidance (especially for manufactured stone) before recommending any sealer, and we never seal over active moss or damp, dirty surfaces.
Common DIY Mistakes to Avoid
If you’re thinking of tackling some of this yourself, we shared with Rick a few pitfalls we see all the time:
- Using too much pressure: Etched concrete and gouged stone are expensive to repair.
- Using the wrong chemicals: Straight bleach, toilet cleaner, or undiluted degreasers can permanently discolor surfaces.
- Ignoring safety: Mossy stone is slippery; always use non-slip footwear and be careful on slopes and steps.
- Skipping the rinse: Leaving cleaner residue can attract more dirt and potentially damage plants.
When to Call in a Professional
For Rick, the combination of older stone, exposed aggregate, and a large area meant it made sense to have us handle the job. In general, we suggest calling a pro if:
- You have decorative or older stone you really care about preserving
- You see cracks, loose mortar, or crumbling areas
- You’re dealing with steep, slippery slopes or multi-level entries
- You’ve tried DIY cleaning and the moss still comes right back
Handled correctly, moss removal doesn’t have to mean damaged stone or etched walkways. With the right process — inspection, gentle mechanical removal, appropriate cleaners, and controlled pressure — we can get your surfaces clean and help keep them that way longer.
If your stone, exposed aggregate, or walkways are starting to look like Rick’s did, we’re always happy to take a look, explain options, and recommend the safest approach for your home.